Firstly, this is not a scary as it sounds – but there are a few things that you need to be aware of:
Do not go and create a lot of ‘test users’ without having a clear strategy for their removal and implementation.
Do use permissions on roles and not on individual user accounts. Not even for ‘a quick test’.
Do use inheritance
This will save you a lot of pain and head scratching in the future.
Talk to one of our digital experts
Tom Houdmont
Head of Business Solutions
Do you have an idea or a project you need support with?
Tom leads Box UK’s Business Solutions team and has over 15 years experience in the web industry. Tom is passionate about creating impactful solutions that solve real problems and deliver the outcomes our clients need.
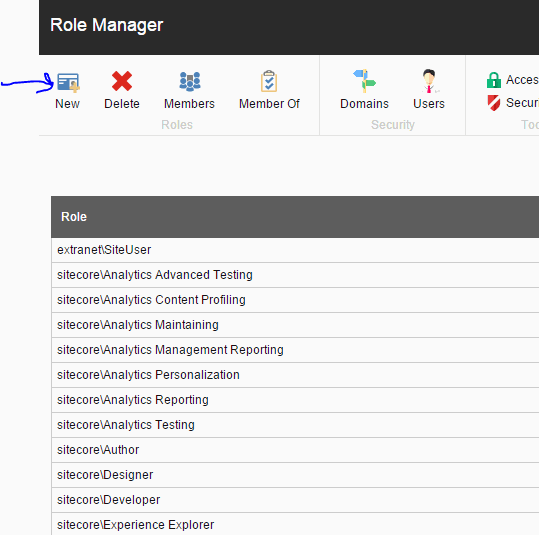
In Sitecore, navigate to the Role Manager and select New.
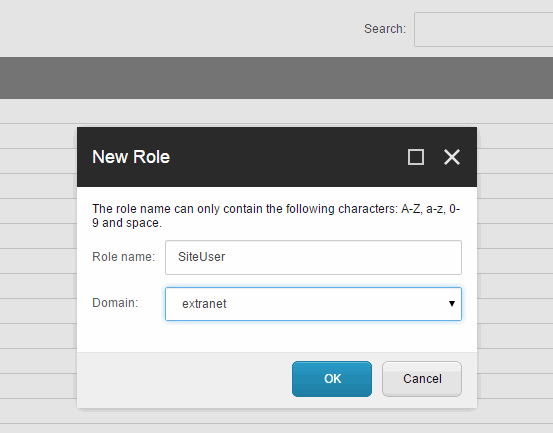
2. Set up the role
Give your role a name (I called mine SiteUser). Make sure the domain is extranet.
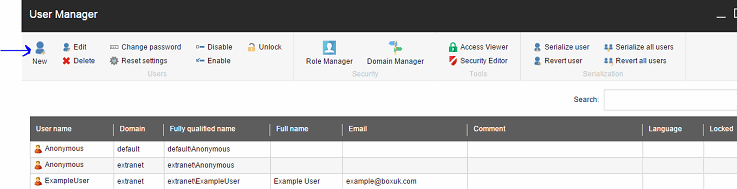
3. Create a user
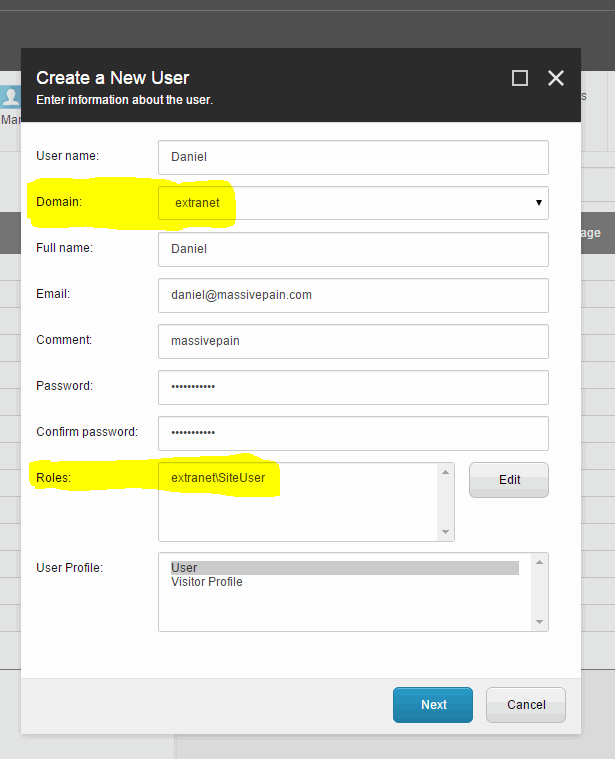
Go to the User Manager and create a new user. I have called mine Daniel. This user now needs to be assigned to the role you created above. Notice in the example below I have set the domain as extranet and have assigned them to the role I created in the previous step.
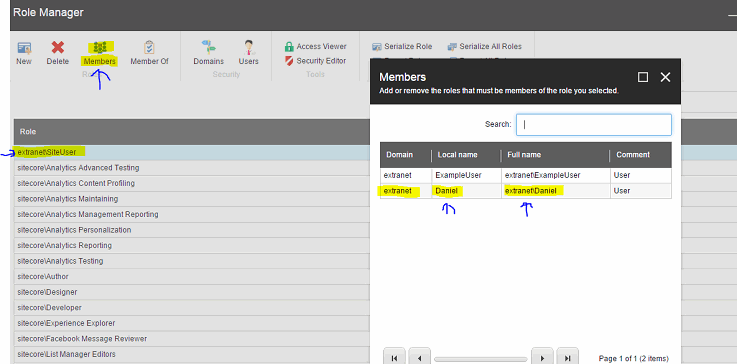
4. Check the role is assigned
So we now have a role and a user assigned to the role. You can check this by going back to the Role Manager and selecting the role that you have created; then select members in the ribbon and you should see your user as a member of the role.
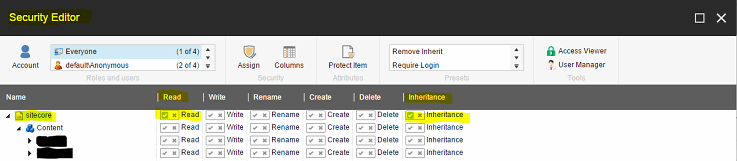
5. Assigning permissions for ‘Everyone’ role
Next go to the Security Editor. The principal here is to select the ‘Everyone’ role (already setup in Sitecore) and allow access and inheritance on the very first item. This will enable you to start from ‘everything allowed’ with each role for which you wish to lock items.
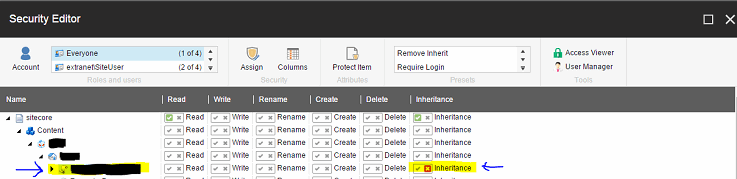
6. Removing permissions for ‘Everyone’ role
I have decided to lock the item under the home icon. I have done this by removing the inheritance, thus ‘Everyone’ no longer has access to this item.
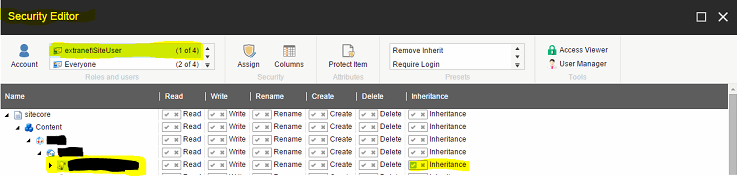
7. Assigning permissions for ‘SiteUser’ role
I have decided to allow access to the item under the home icon for the ‘SiteUser’ role only. I have done this by allowing the inheritance, thus anyone now in the ‘SiteUser’ role will have access to this item.
8. Save and publish, and test that it works
Publish the page you have just locked and navigate to it on the front end in a new incognito window. *These two steps are very important to see the changes reflected on the front end of the website*. You should be redirected to a 404 page.
Why did I go to a 404 page?
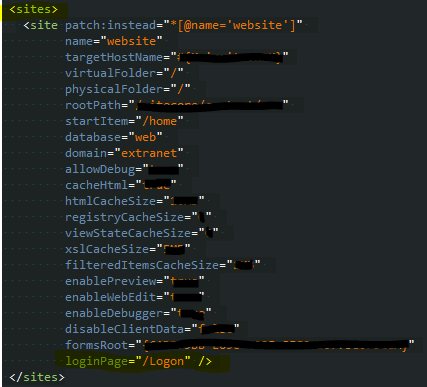
This is because by default our site configuration has been set up with nothing in the entry for loginPage property inside the site node. In the web.config, search for the <sites> node. Below I have set up mine up to redirect to my login page (/Login) located under the rootPath item /Home. So the path to my item will be /Content/Home/Login. Once this has been set up, when you try to go to the restricted page you will now be redirected to the page defined in this configuration.
Next steps
You will need to setup your login page and a form that when submitted will send a username and password server-side to be validated against a user within Sitecore. If the validation is successful then the user should be redirected to the requested URL before they are redirected to the login page. Because they are a member of the group that has access to the restricted page they will now be able to view the page rather than get redirected to the login page again.
Take a look at our Sitecore page to find out a developer’s view of the CMS. I hope you have found this helpful.
Nick Rowland
Head of System Engineering and QA
With 25 years of web development experience, Nick has worked with clients from startups to global financial firms. His expertise in application development, server infrastructure, and automation ensures he delivers optimal solutions tailored to client needs.
Subscribe now and get our expert articles straight to your inbox!
"*" indicates required fields
Related Insights
Blog
Maximising the Effectiveness of Digital Strategies in Government Organisations


 Read more: Maximising the Effectiveness of Digital Strategies in Government Organisations
 Read more: Unlocking Member Engagement
 Read more: Turning Interest into Action: Proven Tactics for Boosting Membership Acquisition